

Yoga is a personal practice, and each of us is learning and growing in our own unique way. However, flexibility and core strength are evergreens. Who among us wouldn’t wish to finally break free of that slouched position and say goodbye to back pain? That is precisely what advanced and intermediate yogis may do in Frog Pose. We should find out more.
What is Frog Pose and how can it benefit you?
Get ready for the easiest and quickest yoga pose breakdown you’ve ever seen.
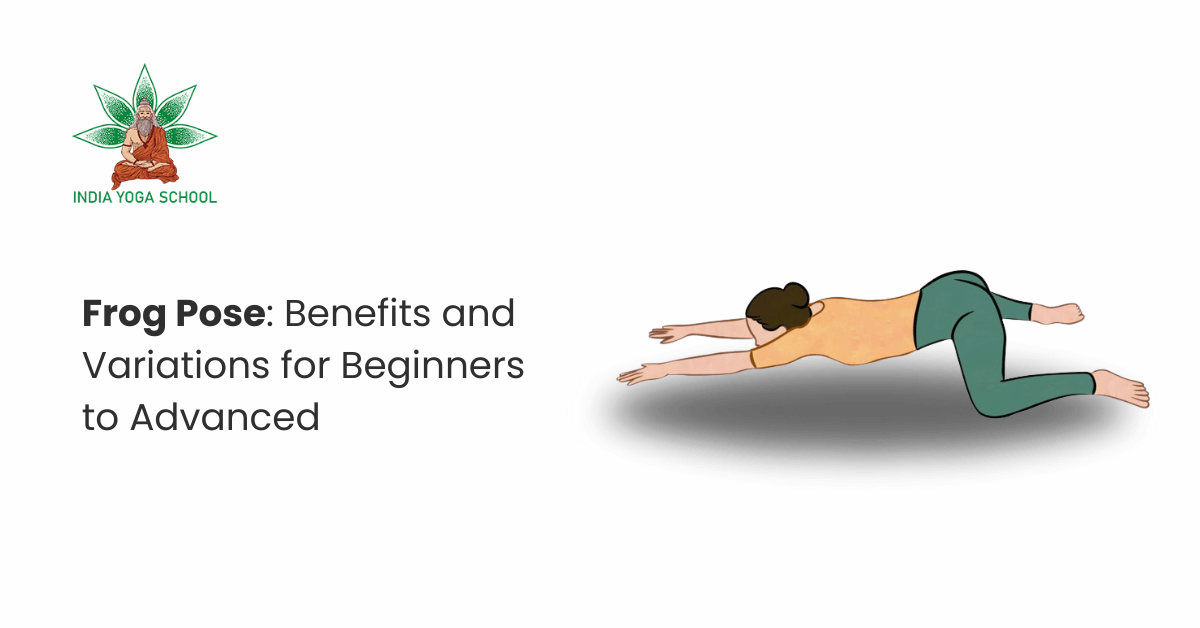
- Mandukasana, which means “frog pose” in Sanskrit, is another name for this yoga posture.
- This role requires ability at the intermediate to expert level. The frog pose is tough.
- Being a “hip opener,” it has the potential to increase range of motion in the inner thighs and hips.
- Also, it helps with building core strength.
- You may not have the skills necessary to succeed immediately, but making adjustments will allow you to be better prepared.
Steps to Do a Frog Pose?
Proceed with caution, as this is a more advanced posture. To ease the strain on your knees, a pad or blanket could be useful if this is your first time trying it.
Here is the yoga posture known as the pose:
- Get down on all fours. As you stand, make sure your knees are under your hips and your hands are under your shoulders.
- Inhale deeply. As you release your breath, start to extend your knees to the sides.
- You should pause and breathe again before continuing to push when you feel a stretch in your inner thighs and groin. Never put more stress on your body than it can handle.
- Lay down on your inner foot, ankles, and thighs by turning your feet side to side.
- Lie on your forearms with your palms facing down toward the floor.
- Settle into this position for five to ten breaths.
- Getting out of the frog pose is as simple as walking your knees back together and raising yourself back up onto your hands.
- Take it easy on those swollen legs if they ache.
There shouldn’t be any pain associated with yoga. Reduce the intensity if you experience any kind of pain. In order to gain confidence, you should probably warm up a bit more or attempt one of the easier positions listed below.
If you want to know if you’re pushing yourself too hard, just look at your breath. Slow down until you can breathe normally again if you’re having trouble taking deep, cleansing breaths.
Also Read: How To Find Your Best Position for Meditation?
How does Kundalini yoga’s Frog Pose enhance one’s practice?
The goal of the frog pose is to increase flexibility in the hips and groins by opening them up. It strengthens your core and focuses on the adductor muscles, which are located in your inner thighs.
For those who endure lengthy periods of sitting at a computer or behind the wheel, targeting these regions can alleviate back pain and hip tightness like magic. Your lower body will get stronger and more flexible as time goes on.
More likely to develop cancer and cardiovascular disease
Yoga has several health benefits, including increasing mobility, strengthening the immune system to these imbalances, encouraging healthy lifestyle choices, and lowering the risk of stress and obesity.
Importantly, there is the stress factor. In addition to alleviating the physical effects of sitting for long periods of time, yoga also boosts emotional and mental wellness.
Once you’ve gotten a little bit further into your yoga practice, you’ll see Frog Pose on your yoga mat. So, you’ll be in the thick of yoga’s advantages before you even have the skills to pull it off.
Also Read: Yoga Nidra Vs Meditation: Differences, Similarities and Benefits
What is Kundalini yoga?
Kundalini yoga, which is often called “the yoga of awareness,” entails more than merely extending your muscles.
That may include:
- Mantras
- Practice deep breathing
- Perform choreographed dance moves
Kundalini energy is a spiritual force that, according to yoga tradition, rises from the base of the spine. This kind of yoga seeks to assist its practitioners in connecting with this energy.
Variations of Frog Pose
Happy Baby Pose!
Mastering the Frog Pose requires practice. Those with some experience in Kundalini yoga consider this a more advanced stance. To master posture, you need to work on your core strength and flexibility in the hips and thighs.
To help you get the hang of Frog Pose, we’ve included some variations and alternatives below. Take advantage of these to boost your self-assurance; they will serve as a launching pad for future achievements.
This easy-to-learn yoga posture focuses on strengthening the inner thighs. To do a perfect frog pose, you must strengthen your thighs.
- Get down on all fours.
- Squeeze your glutes together.
- To keep yourself steady, hold on to the sides of your feet.
- Spread your legs wide apart so that they are wider than your chest. Stretch them to their maximum comfortable width.
- By pressing the sides of your feet into your palms, you can increase resistance.
- Inhale deeply and hold for five to ten breaths.
- Embrace your inner tadpole!
Thread the Needle posing
As you ease into Frog, here’s another beginner-friendly posture that can help you relax your lower back, stretch your inner thighs, and open up your hips.
Stand up straight. In this position, your hips should meet your knees and your hands should be in a straight line with your shoulders, pointing up toward the mat. Inhale deeply.
Exhale slowly and deliberately, and then thread your right arm into the space between your left and right hips. While keeping your right arm stretched to a comfortable length, let your right shoulder fall to the mat.
While resting your right ear and cheek on the carpet, tilt your head to the left. If you want to avoid injuring your neck or shoulders, you should keep your weight well distributed and choose a comfortable spot to rest your right shoulder.
Also Read: Differences between Ashtanga and Vinyasa Yoga
To get the most out of this stretch, lift your hips and slightly lift your left elbow.
- Lift your shoulders and arch your back to relieve strain on your lower back. Let go of the stress in your shoulders, arms, and neck by taking a moment to breathe deeply.
- Keep this position for as long as you feel comfortable, which could be up to a minute.
- After you’ve slid your right arm out from beneath your left arm, you can exit the stance. To make room for your left arm to release, gently press down on it. To get back into the all-fours position, bring your right arm back to its starting point in step 1.
- Give each side the same length of time to hold the stance, then switch sides to distribute the love.
Reclined Bound Angle Pose
Now is the time to really turn it up. While not recommended for those with weak knees or thighs, the reclined-bound angle is a good compromise between the frog pose and other more advanced positions. Never put your body through more than it can handle; the same safety measures apply.
How do I do it?
- Keep your feet level on the floor and your knees bent while you lie face up.
- Breathe deeply and bring your toes together by sliding the bottoms of your feet inside.
- As far as your knees will go without causing any strain, let them fall to the sides.
- Brace yourself by placing your right palm on your chest and your left palm on your abdomen.
- Exhale slowly and deeply for 5 to 10 breaths.
Half-Frog Pose
You’re almost done! To get from Half Frog to Full Frog (#FrogGoals), you need to make a few adjustments.
It shares many advantages with the other options, but it also has some similar warnings: Get yourself warmed up, and if you feel any pain, just take it slow.
For the perfect half-pose, follow these steps:
- Lay down on your back with your arms at your sides and your palms facing up.
- Retract your shoulders and lift your chest.
- Join your glutes and inner thighs in a tight squeeze.
- As close to your butt as you can manage, bend your left leg and pull the heel up.
- Grab the ball of your left foot with the back of your left hand.
- Align your left elbow with your left foot so it points up once your left heel is as close to your buttocks as it can go comfortably.
- Exhale slowly and deeply for 5 to 10 breaths.
- Get back to where you started and do it again using the opposite leg.
- For an added burn, you can elevate your torso during step 6 by straightening your supporting arm.
Also Read: Complete Guide to the 7 Chakras and their Effects
How safe is Frog Pose?
Frog Pose, like any advanced physical exercise, is all about personal safety, especially in the context of yoga. Injuries and strains might result from attempting flawless form before your lower body is prepared.
Also, think about how far you want to go when utilizing yoga for injury rehabilitation.
If you want to incorporate this position into your normal yoga routines, you should know your body well by then. For that kind of realization, yoga is a great choice. No one else can tell you what you’re capable of safely trying unless you try it.
Conclusion
A difficult leg posture You may tell that you’re making great strides in your yoga practice when you start to master Frog Pose. It isn’t shy about putting stress on critical mobility zones.
To ease into this more advanced yoga pose, try variations such as Half Frog or Happy Baby. Pay close attention to your breathing while you perform any advanced yoga pose; failing to do so will cause you to miss the point entirely.


Leave A Comment